How to Hang Wall Art in Any Room: Complete Guide
The Heva Team
Art Curators & Interior Design Enthusiasts · February 18, 2026 · 15 min read
Stop guessing. The definitive guide to hanging wall art at the perfect height every time, with the 57-inch rule, wall anchor advice, and gallery wall layouts.
You found the perfect canvas print, carried it home, and now you are standing in front of a blank wall with a hammer in one hand and doubt in the other. Where exactly should the nail go? How high is too high? Will it even stay on drywall? You are not alone. Hanging art incorrectly is one of the most common interior-design mistakes, and it can make an otherwise beautiful piece look awkward, disconnected, or lost on the wall.
This guide walks you through every step, from finding the correct height (hint: it involves a specific number in centimetres) to choosing the right anchor for your wall type, to arranging a gallery wall that actually looks intentional. Whether you are hanging your first canvas or your fiftieth, the rules below will save you from unnecessary nail holes and crooked frames.
Ready to browse? Explore our full wall art collection, or keep reading for our top picks and expert tips.
The 57-Inch Rule: Why 145 cm Is Your Magic Number
Museums, galleries, and professional interior designers around the world use the same baseline: the centre of the artwork should sit 145 cm (57 inches) above the floor. This measurement corresponds to the average adult eye level, which means the art meets your gaze naturally instead of forcing you to look up or down. Park West Gallery, one of the largest art dealers in the world, recommends this rule as the single most important guideline for hanging art at home.
Here is how to calculate the exact nail position:
- Measure the canvas height. Let us say your framed canvas is 81 cm (32 inches) tall.
- Divide by two. Half of 81 cm is 40.5 cm (16 inches). This is the distance from the frame edge to the artwork centre.
- Measure the hanging hardware. Flip the canvas over and measure from the top edge down to the taut wire or D-ring. Suppose it is 5 cm (2 inches).
- Do the maths. Start with 145 cm. Add the half-height (40.5 cm), then subtract the hardware distance (5 cm). That gives you 180.5 cm (71 inches) from the floor. Mark that spot on the wall. That is where your nail or screw goes.
The 57-inch rule works in every room, from living rooms and bedrooms to hallways and stairwells. The only time you adjust is when art hangs above furniture, which we cover in the step-by-step section below. For a deeper dive on sizing your canvas to your room, read our guide on how to choose the perfect wall art size for your living room.
Tools You Need Before You Start
Gathering your tools before you pick up the hammer prevents the frustrating back-and-forth to the garage mid-project. Here is what professionals keep in their hanging kit:
- Tape measure: Accurate to the millimetre. A 5-metre (16-foot) retractable steel tape is ideal.
- Pencil: A light mark on the wall is easy to erase. Avoid pens or markers.
- Spirit level: A 60 cm (24-inch) bubble level ensures your canvas is not tilted. A smartphone level app works in a pinch, but a physical tool is more reliable.
- Painter's tape: Use it to mock up layouts on the wall before committing to holes. Trace the outline of each frame with tape strips so you can step back and judge spacing from across the room.
- Stud finder: Essential for hanging heavy pieces. Electronic stud finders cost as little as $20 and save you from anchoring into hollow drywall with an undersized nail.
- Picture hooks or wall anchors: The specific type depends on your wall material (see the next section).
- Hammer or drill: A hammer works for hooks rated up to 11 kg (25 pounds). For heavier frames or masonry walls, you will need a cordless drill with the correct bit.
A quick pro tip: cut a piece of kraft paper or newspaper to the exact dimensions of your canvas, tape it to the wall, and live with it for a day. This zero-commitment test reveals whether the position feels right before you make a single hole.
Wall Types and the Right Anchors
The anchor you choose depends entirely on your wall material. Using the wrong fastener is the number-one reason canvases crash to the floor at 2 a.m. Here is a breakdown:
Drywall (Plasterboard)
Most North American and many European homes have drywall. For canvases under 11 kg (25 pounds), a standard picture hook with an angled nail is sufficient. For heavier pieces, use a toggle bolt or a self-drilling drywall anchor rated to at least 23 kg (50 pounds). Always check the weight rating on the package.
Plaster Walls
Older homes often have lath-and-plaster walls, which are harder but more brittle than drywall. Drill a pilot hole first using a masonry bit to avoid cracking the plaster. Then insert a plastic wall plug and drive a screw into it. Never hammer a nail directly into plaster without a pilot hole.
Brick or Concrete
Masonry requires a hammer drill and a masonry bit. Drill into the mortar joint rather than the brick face, because mortar is easier to patch if you ever move the art. Use a masonry anchor or expansion bolt rated for the weight of your canvas.
Wooden Studs
If your stud finder locates a wooden stud behind the drywall, drive a screw directly into it. A single wood screw in a stud can hold up to 45 kg (100 pounds), which is more than enough for even our largest canvases. This is the strongest, most reliable method.
For renters who cannot drill holes, adhesive hooks rated for 3 to 7 kg (7 to 16 pounds) are a damage-free alternative. Our guide on wall art for renters covers additional no-damage solutions including picture rail systems and leaning shelves.
Grouping Rules: Spacing, Symmetry, and Gallery Walls
A single canvas on a large wall makes a bold statement, but grouping multiple pieces creates visual rhythm and fills space more effectively. The key is consistent spacing. Professional designers keep 5 to 8 cm (2 to 3 inches) between frames in a grouping. Anything tighter and the frames feel cramped; anything wider and the collection loses cohesion.
Three common layouts work in virtually every home:
- Symmetrical grid: Equal-sized canvases arranged in rows and columns. This layout suits modern and minimalist interiors. A 2-by-2 or 2-by-3 grid with 5 cm (2-inch) gaps reads as clean and deliberate.
- Salon style (gallery wall): Mixed sizes and orientations clustered together. The trick is to anchor the arrangement around one large central piece and build outward. Keep the overall silhouette roughly rectangular or oval. For a full walkthrough, see our gallery wall step-by-step guide.
- Horizontal line: Three to five canvases hung in a single row with their centres aligned. This works above a sofa, headboard, or dining bench. The total width of the row should be roughly two-thirds the width of the furniture below.
When grouping pieces, treat the entire cluster as one unit and apply the 145 cm (57-inch) rule to the centre of the group, not to each individual piece. Step back at least 3 metres (10 feet) after hanging to check that the arrangement looks balanced from a normal viewing distance. According to Apartment Therapy, spacing your frames about 5 to 8 cm (2 to 3 inches) apart is the sweet spot for gallery walls.
6 Canvas Prints Worth Hanging Right
Now that you know where and how to hang art, here are six gallery-quality framed canvas prints from our collection. Each one arrives ready to hang with pre-installed hardware, so you can skip the framing step entirely.
1. Volcano Summit Landscape Canvas
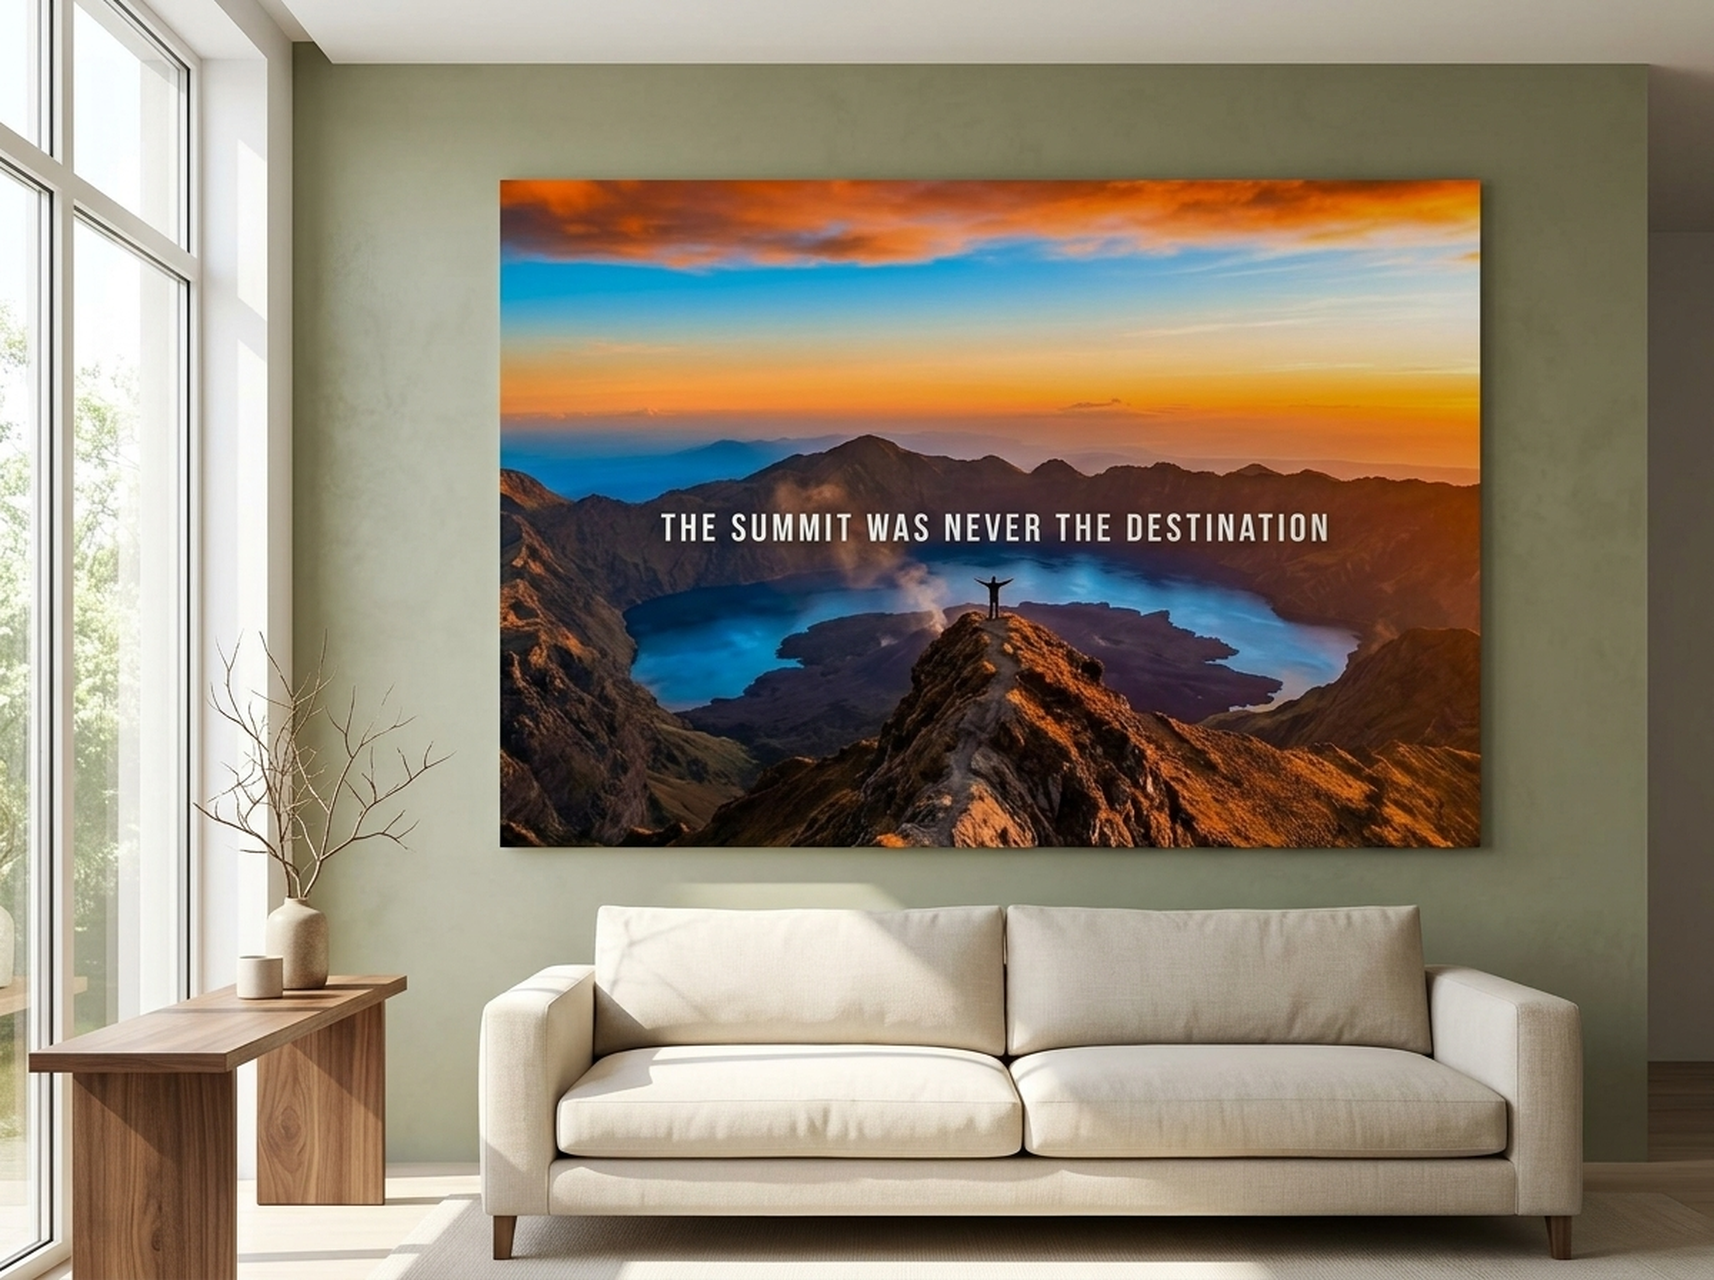
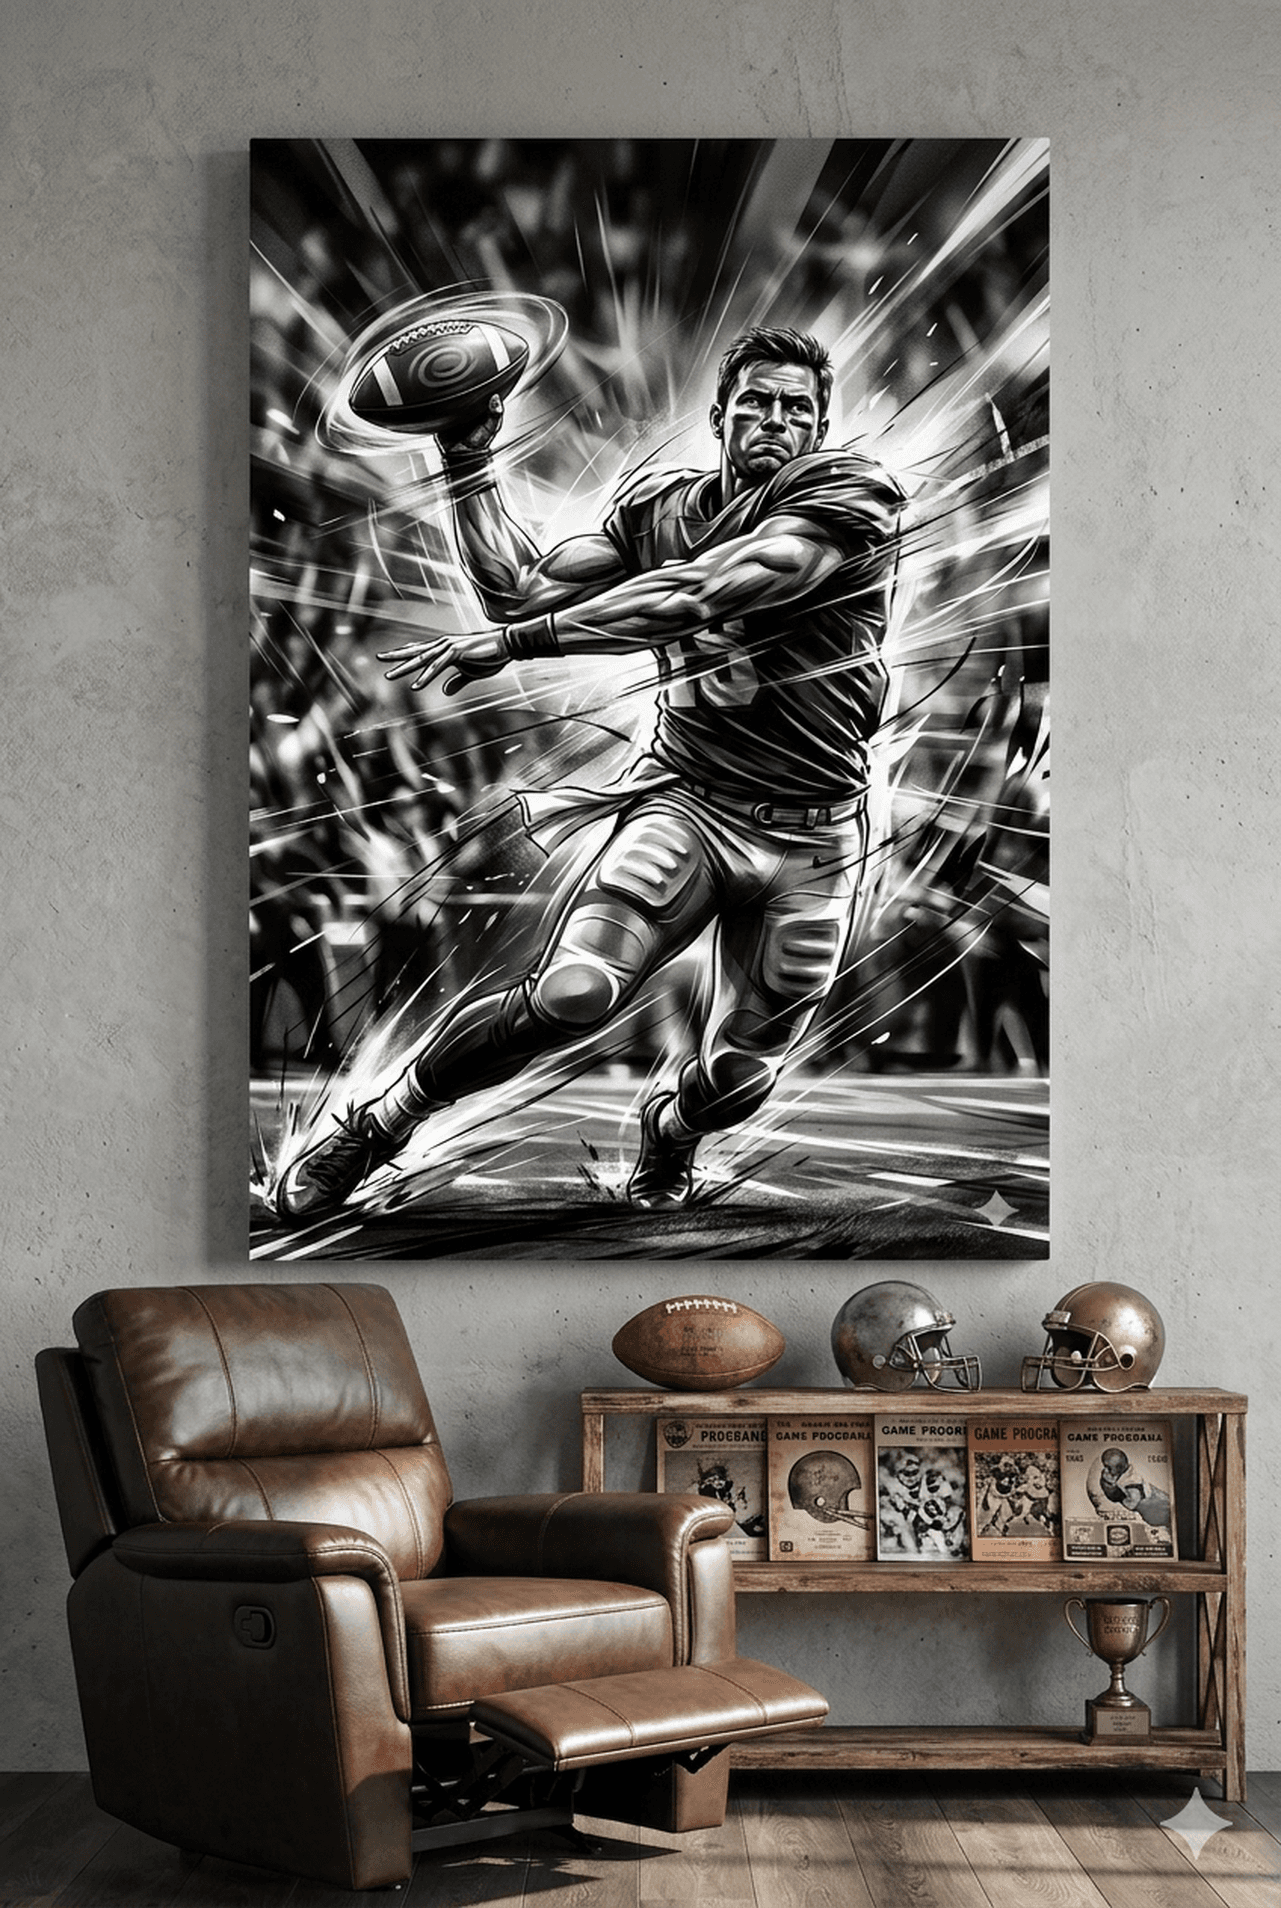
This volcanic summit landscape commands attention with its fiery amber tones against a moody twilight sky. The dramatic scale makes it ideal for a large wall where you need a single statement piece. Hang it 145 cm (57 inches) from the floor to the centre, and let it dominate the space without competing art nearby. The warm palette works beautifully above a dark leather sofa or a mid-century walnut console. A single picture light angled at 30 degrees will make the molten colours glow after sunset.
View the Volcano Summit Landscape Canvas →
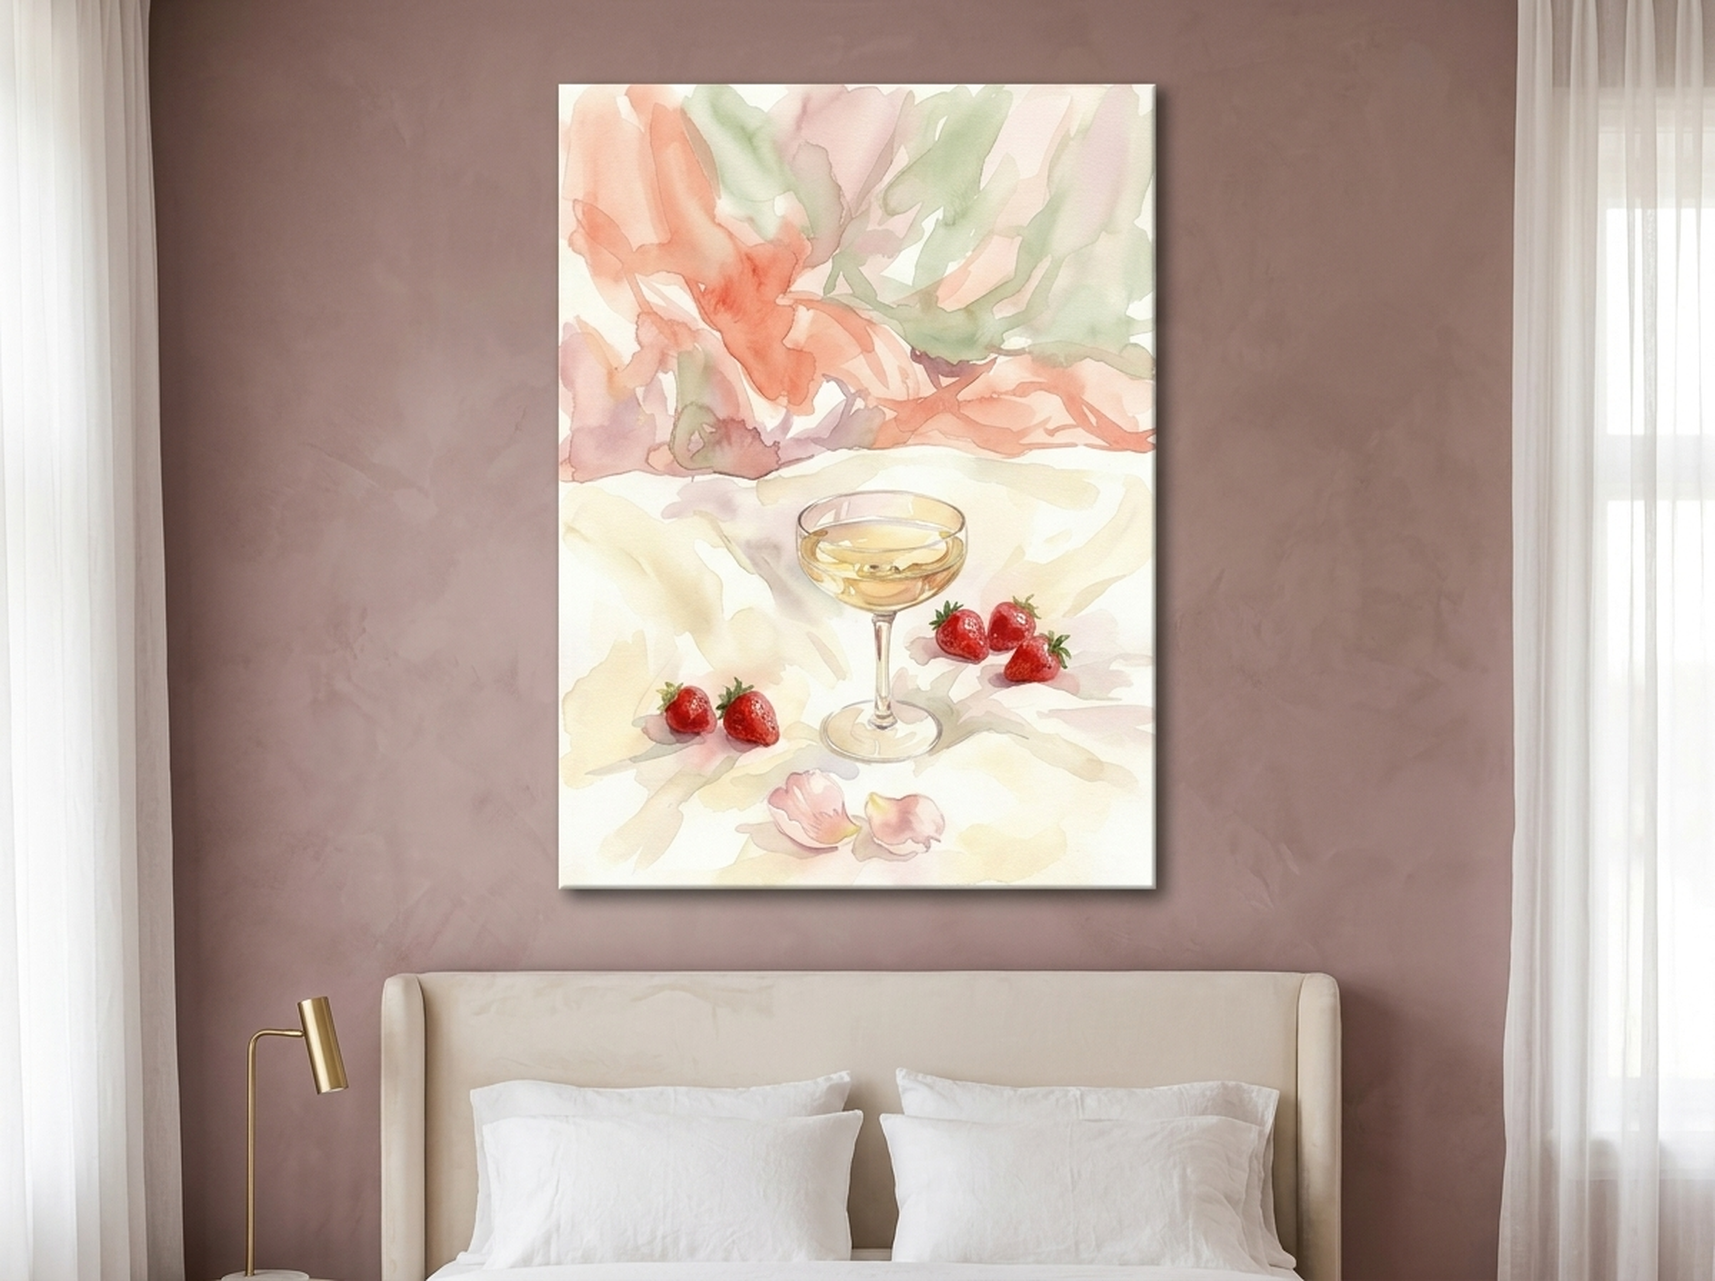
2. Champagne Strawberry Watercolour Canvas
Soft watercolour washes of blush and cream make this champagne-and-strawberry still life a natural fit for a romantic bedroom or elegant dining nook. Its gentle palette pairs with linen bedding, gold hardware, and pale wood furniture. Hang it 10 to 20 cm (4 to 8 inches) above a headboard or sideboard so the art feels connected to the furniture rather than floating in space. Because the tones are light, choose a wall colour one or two shades deeper, like dusty mauve or warm taupe, to give the piece a frame of contrast.
View the Champagne Strawberry Watercolour Canvas →
3. Pampas Vases Sculptural Canvas
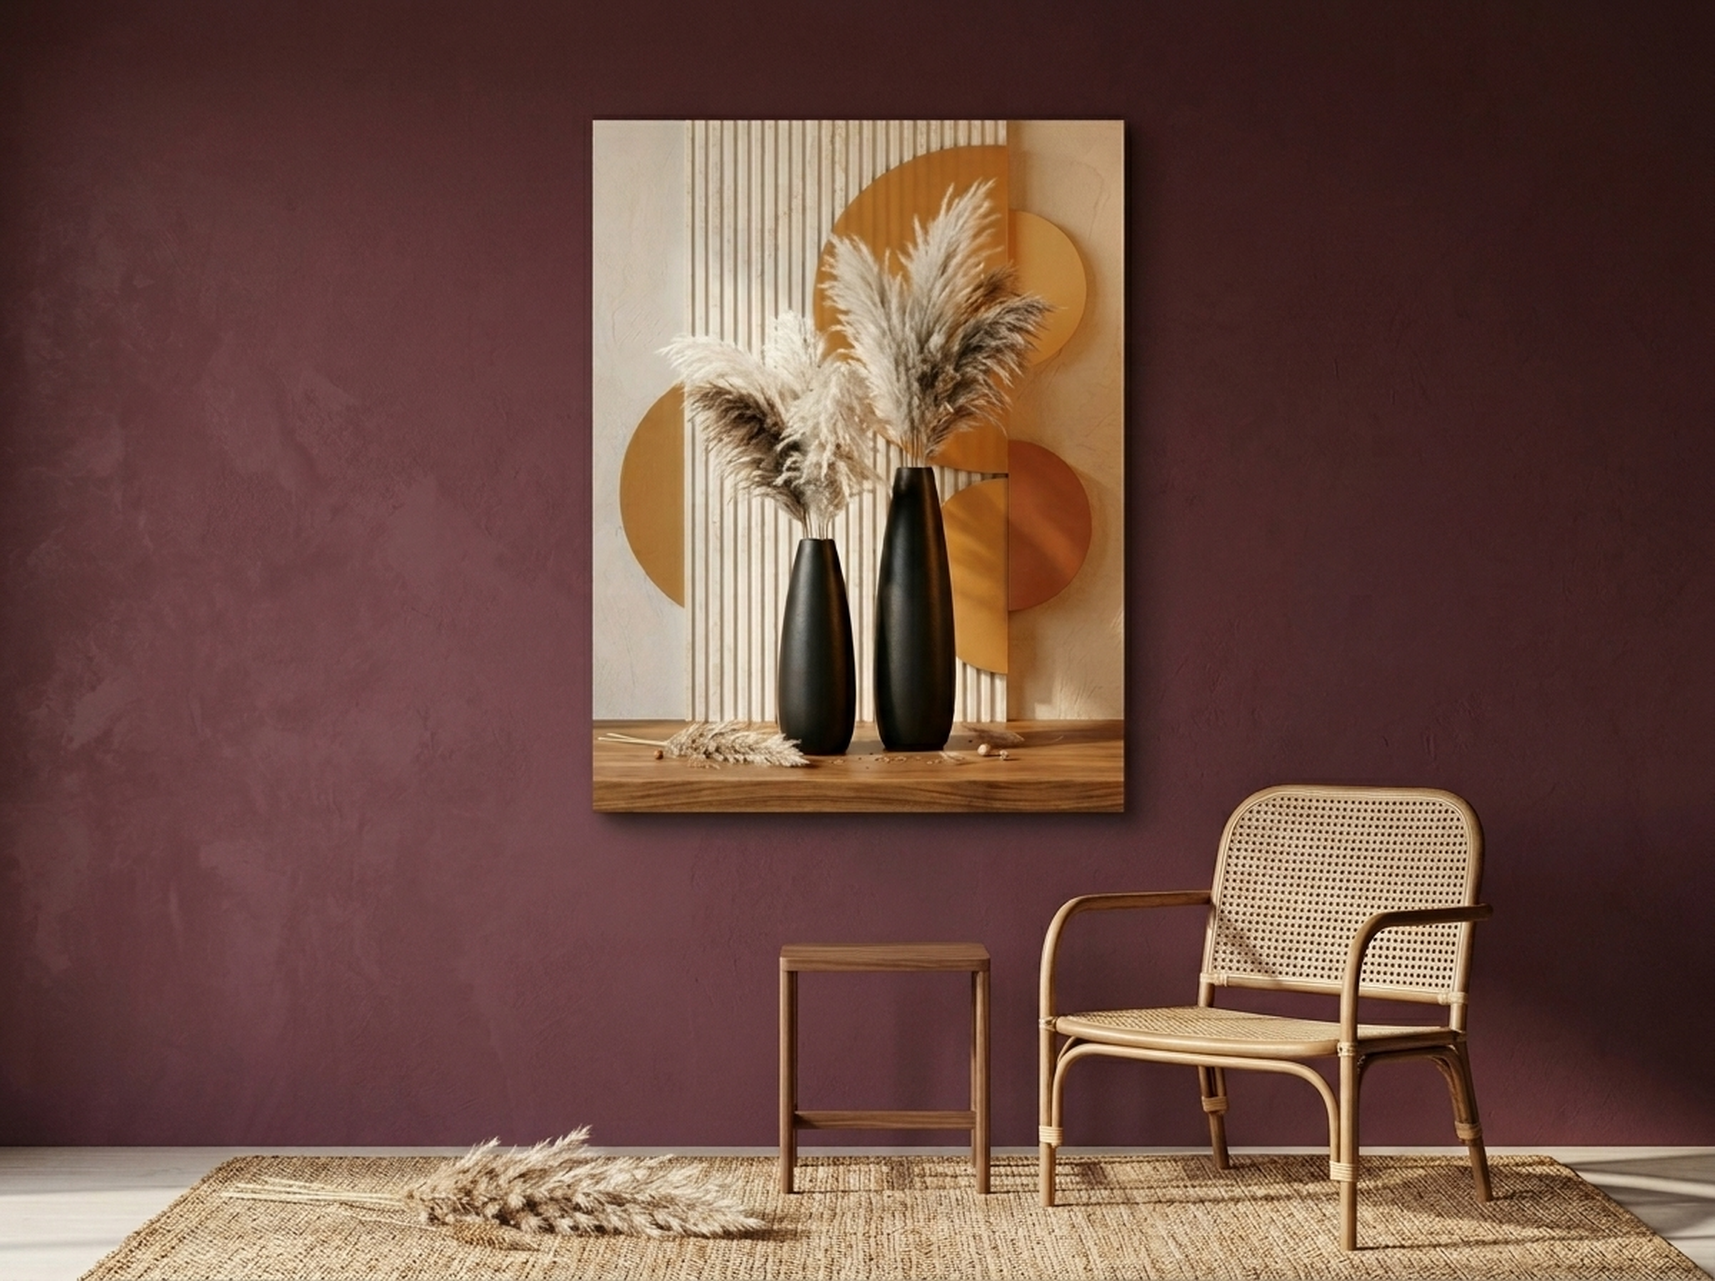

Black and gold sculptural vases with pampas grass give this piece a refined, gallery-worthy presence that elevates narrow spaces. Hallways and entryways are prime territory for a single vertical canvas because the natural sight line draws visitors straight to the art. Position it at the standard 145 cm (57 inch) centre height and pair it with a slim console table below. The neutral colour scheme means it coordinates with almost any wall paint, from crisp white to charcoal grey.
View the Pampas Vases Sculptural Canvas →
4. Sunbeam Forest Oil Painting Canvas
Sunlight streaming through old-growth redwoods creates a sense of depth and calm that makes this piece perfect for a living room or private study. The vertical composition draws the eye upward, which is especially effective in rooms with standard 240 cm (8 foot) ceilings because it tricks the brain into perceiving more height. Hang it so the centre sits at eye level, and frame it with two wall sconces placed 25 to 30 cm (10 to 12 inches) on either side for balanced illumination.
View the Sunbeam Forest Oil Painting Canvas →
5. Rise and Grind Motivational Canvas
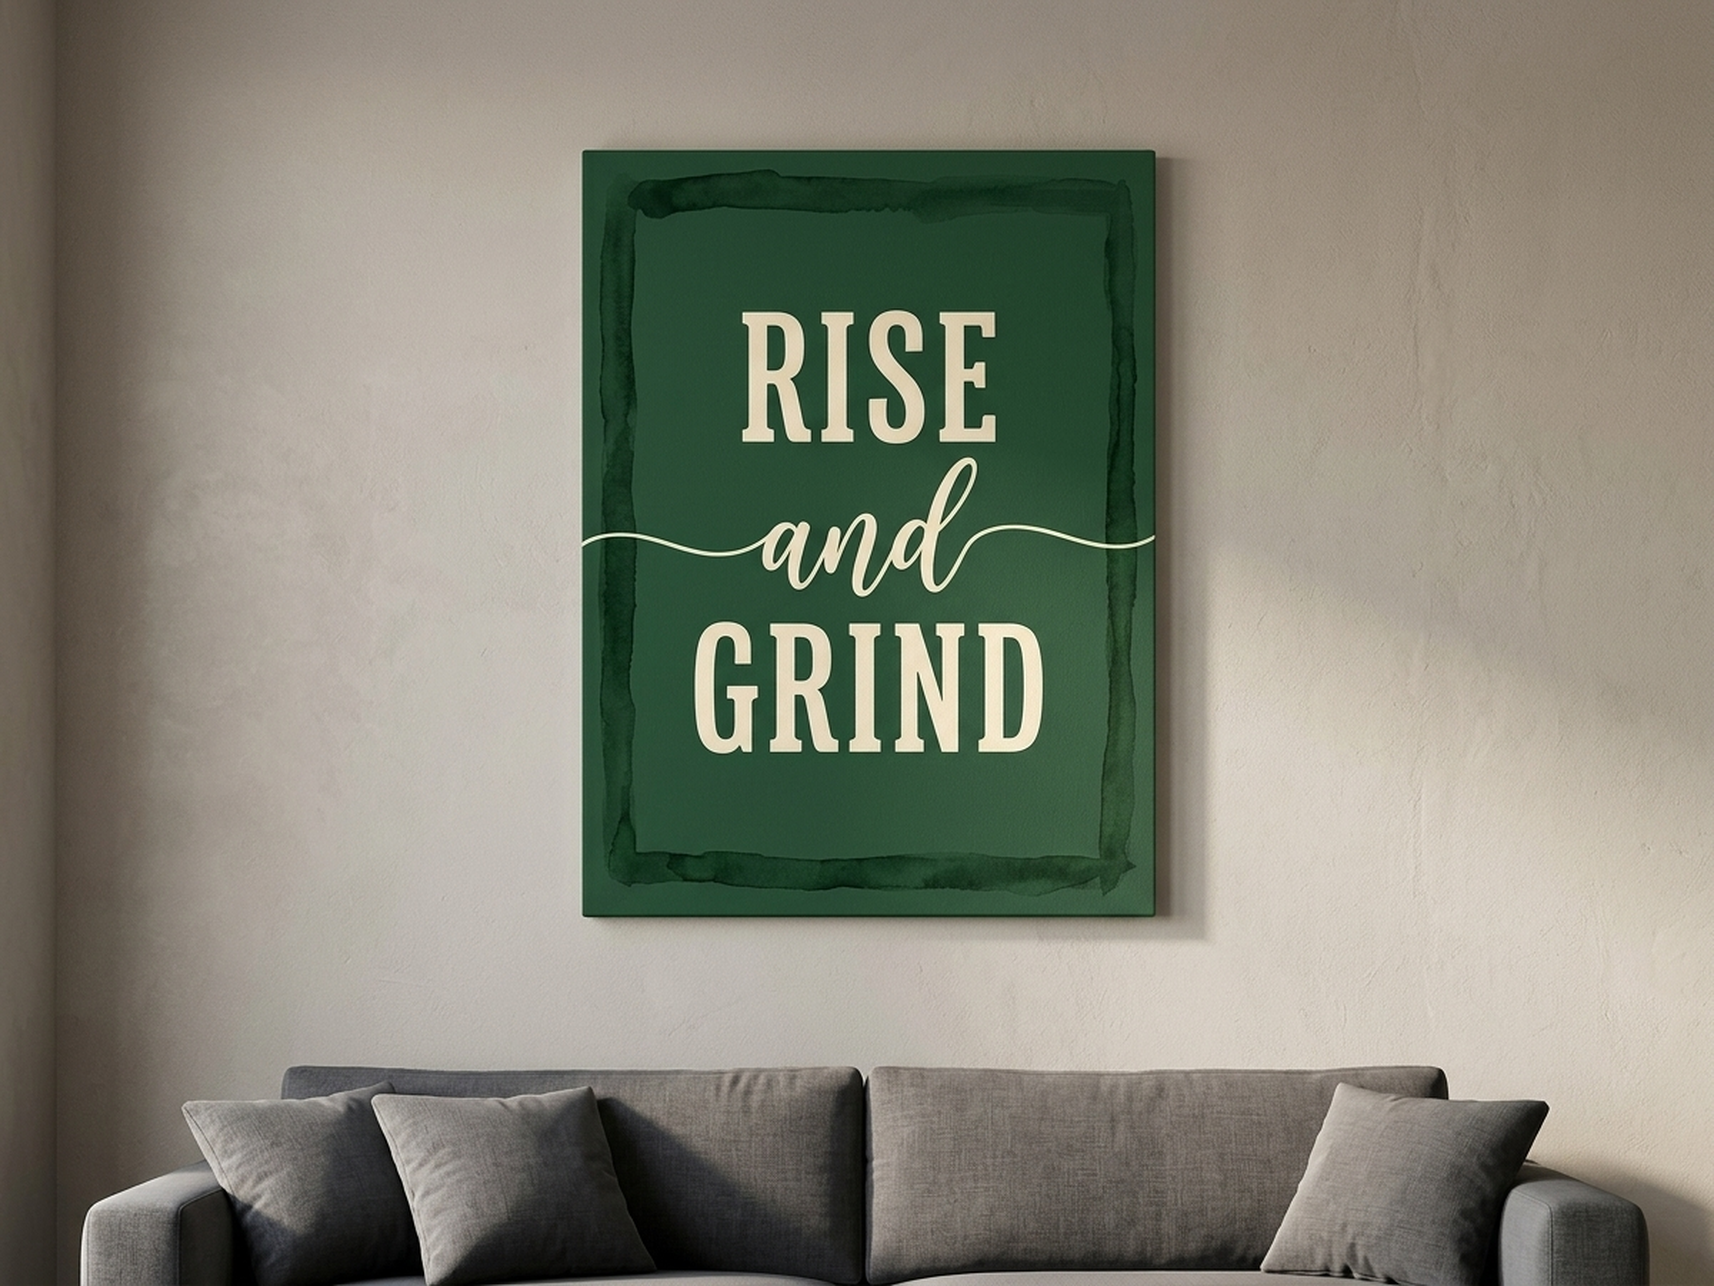
Bold typography on a textured green background makes this motivational print a practical choice for a home office or workout corner. The message is legible from across the room, which means you can hang it directly in your line of sight from your desk chair. Position it at 145 cm (57 inches) centre if it hangs on an open wall, or 10 to 15 cm (4 to 6 inches) above a standing desk so the art and furniture read as one unit. The earthy green tone keeps the energy focused without feeling aggressive.
View the Rise and Grind Motivational Canvas →
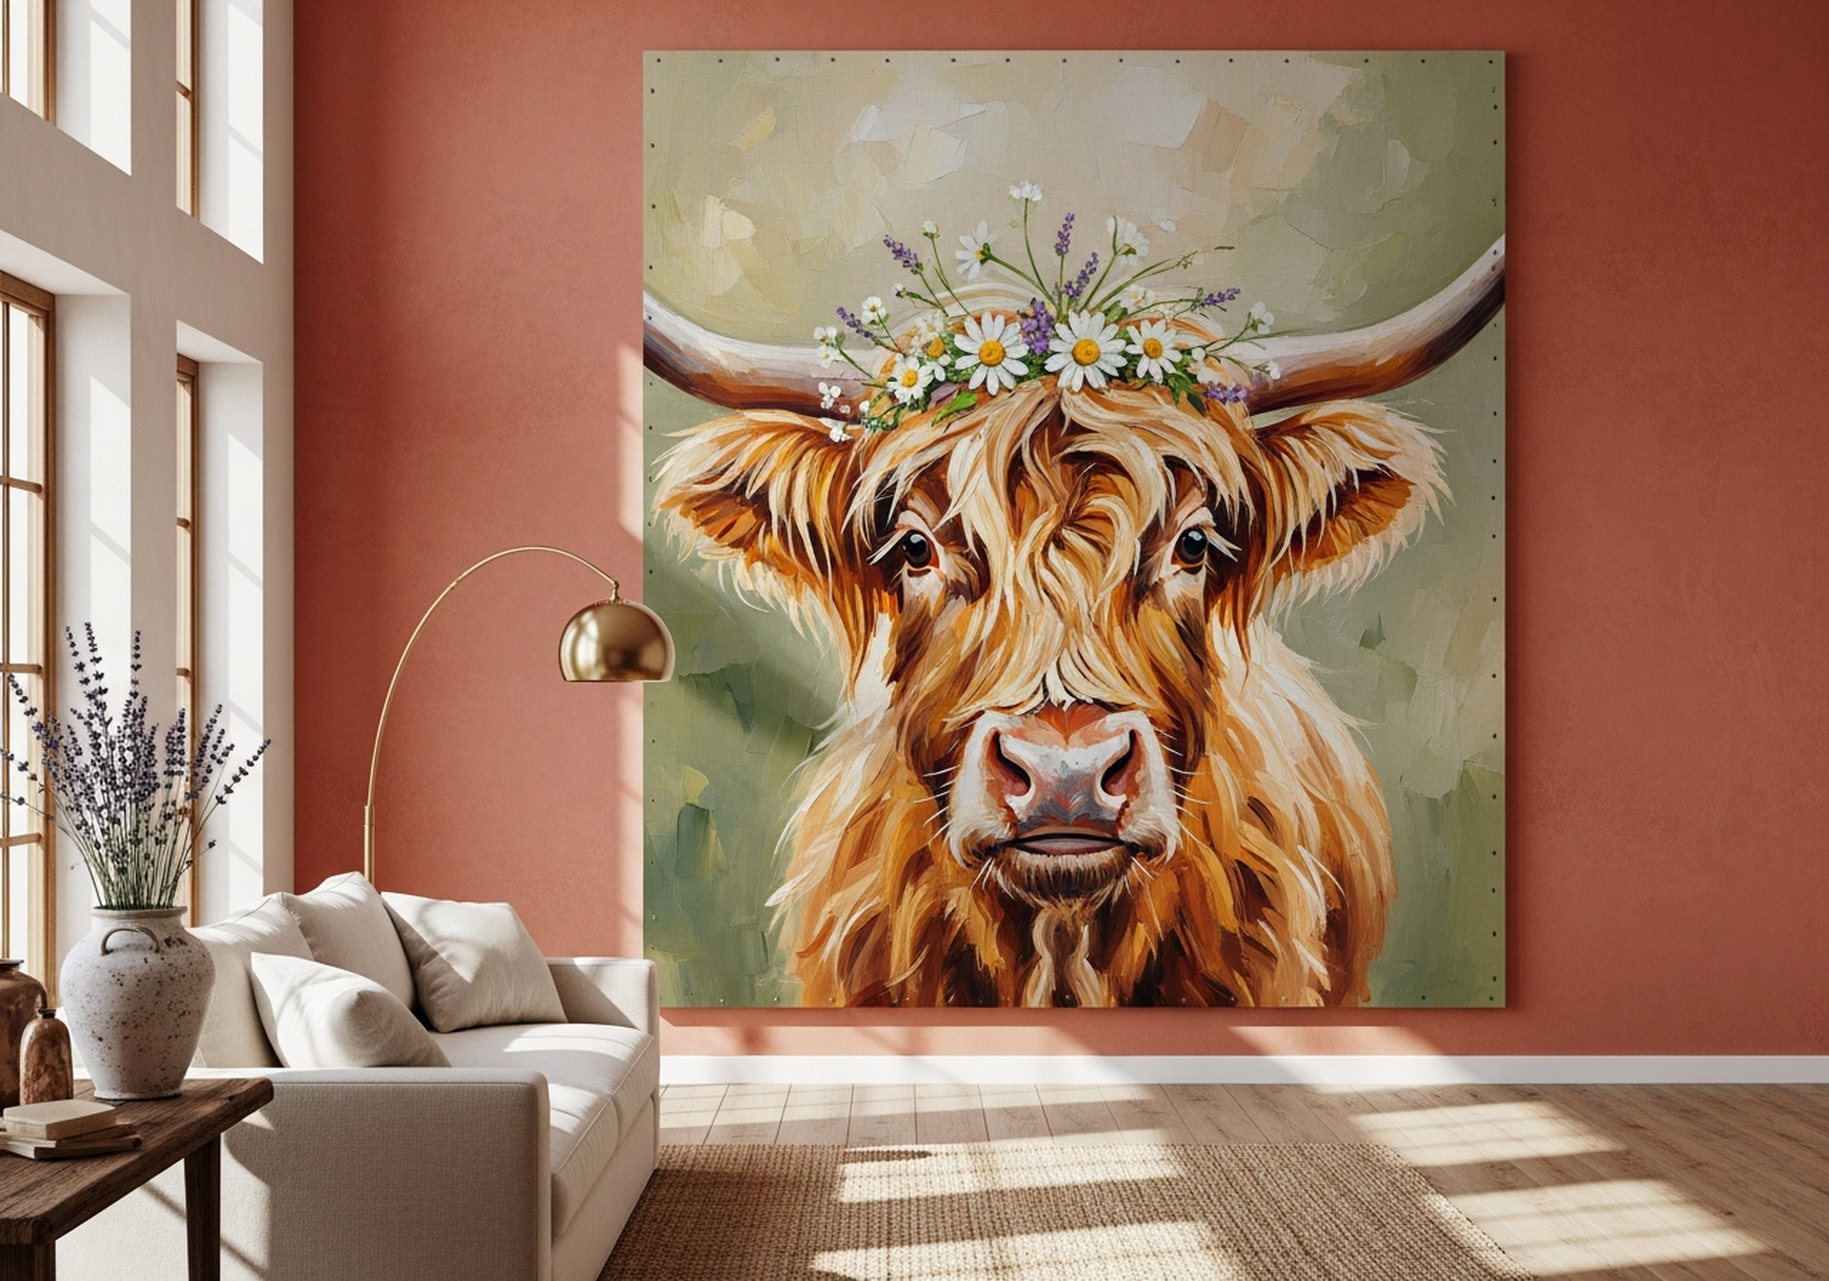
6. Highland Cow Impressionist Canvas
Thick, impressionist brushstrokes bring this highland cow portrait to life with warm earth tones that complement rustic and farmhouse interiors. Hang it in a kitchen, breakfast nook, or cosy den where its inviting personality can serve as a conversation starter. When hanging above a fireplace mantel, place the bottom edge of the frame 10 to 15 cm (4 to 6 inches) above the mantel shelf, not at the standard 145 cm centre rule, because the mantel itself acts as a visual anchor. Pair it with natural wood frames and woven textiles for a cohesive country feel.
View the Highland Cow Impressionist Canvas →
Step-by-Step Hanging Guide
Follow these steps in order, and you will get a perfectly placed canvas on the first attempt.
Step 1: Decide on Placement
Stand in the room and identify the wall that draws your eye first when you enter. That is your feature wall. If the art goes above furniture, measure the furniture width. The canvas or canvas grouping should span roughly 60 to 75 percent of the furniture width. A 183 cm (72-inch) sofa, for example, pairs best with a canvas or arrangement that spans 110 to 137 cm (43 to 54 inches).
Step 2: Mark the Centre Point
On an open wall, measure 145 cm (57 inches) from the floor and make a light pencil mark. Above furniture, measure 10 to 20 cm (4 to 8 inches) above the top edge of the piece and mark that spot instead.
Step 3: Calculate the Hook Position
Measure the canvas height and divide by two. That is the distance from the centre to the top edge. Then measure from the top edge to the hanging wire or D-ring when pulled taut. Add the first number to your centre-point mark, then subtract the wire distance. The result is the exact spot for your hook or screw.
Step 4: Check for Studs
Run a stud finder across the area. If a stud lines up within 5 cm (2 inches) of your mark, shift the hook to the stud. The extra strength is worth the tiny offset, and nobody will notice the difference. If no stud is available, choose the appropriate wall anchor from the wall-type guide above.
Step 5: Install the Hardware
For a picture hook, hold the hook at the mark with the nail angled downward at roughly 45 degrees and tap it in with three or four controlled hammer strikes. For a wall anchor, drill a pilot hole first, insert the anchor, and then drive the screw until it protrudes about 6 mm (a quarter inch).
Step 6: Hang and Level
Lift the canvas onto the hook or screw. Place a spirit level on top of the frame and nudge the canvas left or right until the bubble is centred. Step back 3 metres (10 feet) and check that the art looks straight and sits at a comfortable viewing height. Adjust if necessary.
Step 7: Secure Against Shifting
Small adhesive bumpers on the two bottom corners of the frame prevent the canvas from tilting over time. These clear rubber pads cost almost nothing, and they also protect the wall from scuff marks. Press one onto each lower corner and gently push the canvas flush against the wall.
5 Common Mistakes to Avoid
- Hanging too high. This is by far the most frequent error. Art placed above 160 cm (63 inches) at the centre makes a room feel disconnected and forces you to crane your neck. Stick to 145 cm (57 inches) and resist the urge to "fill" tall walls by raising the art. Use taller art instead.
- Ignoring the furniture relationship. Art floating 60 cm (24 inches) above a sofa looks untethered. Keep the gap between the top of the furniture and the bottom of the frame between 10 and 20 cm (4 to 8 inches) so the two elements read as a single composition.
- Using the wrong hardware. A single nail in drywall cannot support a large framed canvas. If your piece weighs more than 5 kg (11 pounds) and there is no stud behind the wall, use a rated wall anchor. Checking the weight limit on the packaging takes five seconds and prevents a disaster.
- Skipping the paper template. Eyeballing the position leads to extra holes. Trace your canvas on kraft paper, tape it to the wall, and adjust until the placement is perfect. Only then pick up the hammer.
- Spacing gallery wall pieces too far apart. Gaps wider than 8 cm (3 inches) break the visual connection between frames. The collection should feel like a family, not a scattered afterthought. Keep gaps at 5 to 8 cm (2 to 3 inches) for tight, cohesive groupings.
Frequently Asked Questions
How high should I hang a picture above a sofa?
The bottom edge of the frame should sit 10 to 20 cm (4 to 8 inches) above the top of the sofa back. This gap is close enough to link the art and furniture visually, but wide enough to prevent someone leaning back from bumping the frame. The total width of the art or art grouping should be roughly two-thirds the sofa width.
Can I hang canvas art in a bathroom?
Yes, as long as the bathroom has adequate ventilation. Canvas prints are more moisture-resistant than paper prints, and our framed canvases use a sealed backing that adds extra protection. Avoid hanging art directly above a shower or bathtub where steam exposure is constant. A wall opposite the vanity or beside the door is a safer location.
What is the best way to hang art on a rental wall without drilling?
Adhesive picture-hanging strips are the most reliable no-drill option. Look for strips rated to hold at least 5 kg (11 pounds). Clean the wall with rubbing alcohol first, press the strip firmly for 30 seconds, and wait one hour before hanging the canvas. Avoid using adhesive strips on textured or freshly painted walls, because the bond may not hold.
Should I use one large piece or several smaller ones?
Both approaches work, but the decision depends on the wall size and the look you want. A single large canvas creates a bold focal point and requires only one hook. A gallery wall with multiple smaller pieces adds texture and personality but demands more planning. If you are new to hanging art, start with one statement piece and build a grouping on an adjacent wall once you feel confident with spacing and levelling.
How do I hang art on a staircase wall?
Follow the slope of the staircase by keeping the centre of each piece at 145 cm (57 inches) from the nearest stair tread rather than from the floor at the bottom. Space frames 5 to 8 cm (2 to 3 inches) apart, and use a spirit level on every piece. The result should be a diagonal line of art that steps up naturally with the stairs.
Do your canvas prints come ready to hang?
Yes. Every canvas print in our collection ships in a solid frame with pre-installed hanging hardware. Choose from four frame finishes: black, white, espresso, or natural wood. The canvas is printed on premium matte material and arrives ready to hang straight out of the box. No additional framing or assembly is needed.
Quick Reference Table
| Canvas Print | Best For | Dominant Colours | Link |
|---|---|---|---|
| Volcano Summit Landscape Canvas | Living room feature wall | Amber, orange, deep blue | View |
| Champagne Strawberry Watercolour Canvas | Bedroom or dining room | Blush, cream, rose | View |
| Pampas Vases Sculptural Canvas | Hallway or entryway | Black, cream, gold | View |
| Sunbeam Forest Oil Painting Canvas | Living room or study | Gold, emerald green, black | View |
| Rise and Grind Motivational Canvas | Home office or gym | Green, cream, charcoal | View |
| Highland Cow Impressionist Canvas | Farmhouse kitchen or den | Orange, brown, green | View |
Hanging wall art is one of the simplest ways to transform a room from bare to beautiful, and now you have the exact measurements, tools, and techniques to do it right the first time. Every canvas in our collection arrives framed and ready to hang, so the hardest part is already done for you.
Find Your Next Statement Piece
Every canvas print ships framed with pre-installed hanging hardware. Free US shipping on all orders.
Or read more: Wall Art for Living Room: The Ultimate Buyer's Guide